Ad Code

Wednesday, October 23, 2019

Component and Template level design dialogs in Template Editors in AEM

Hello Everyone,

Template Editors is a feature in AEM, which everybody is using right now.
Clients also find it quite exciting, when creation of templates are in their hands.
But Template Editors create few myths in developers minds and I have seen people to
write code based on the basis of myths so I thought of clearing the doubts and wrote about it.

Design Dialog is one of the features which we are using since long and to fetch the value
of design dialog, we always use ${currentStyle.propertyName}.

The concept of design dialog is if you want to share the values of a component across
all the pages created from a single template, we create design dialogs.

Myth:
I have seen people saying that currentStyle doesn't work with dynamic templates so they
always use the PolicyManager whether they really need it or not.Their idea is because previously design_dialog values gets stored in /etc/design/default.. ,currentStyle is only meant for that but because the design dialog value is now inside” /conf/projectName/policies/…” so to fetch the value from policies we need to use PolicyManager API like shown below.
ContentPolicyManager policyManager = resourceResolver.adaptTo(ContentPolicyManager.class);
        if (policyManager != null) {
            ContentPolicy contentPolicy = policyManager.getPolicy(resource);
            if (contentPolicy != null) {
                title= (String) contentPolicy.getProperties().get("title");
            }
        }

But this is not correct. currentStyle can also handle design_dialog values stored inside the
policies.
But i just kept on thinking if ${currentstyle.propertyName} works fine for design dialogs then why so much big logic to do the same thing.

So the answer is in template editors, we have two kinds of design dialogs. 
Component Level: Like any older version of AEM, we can create design dialogs in the components and fetch the value using currentStyle.I already talk about it here.
Template Level: Now you can manage the page level design dialog value also and to fetch that value you need to use the PolicyManager API. You just need to pass “currentPage.getContentResource” as resource and you are able to fetch the value.

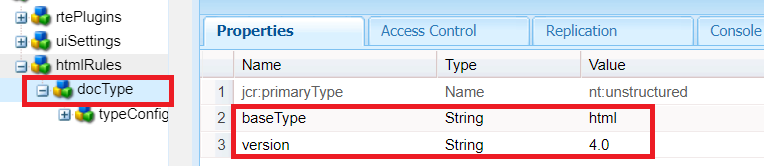
You can see the template level design values(Page Policy) from here:
Fig 1: Page Policy in a Template

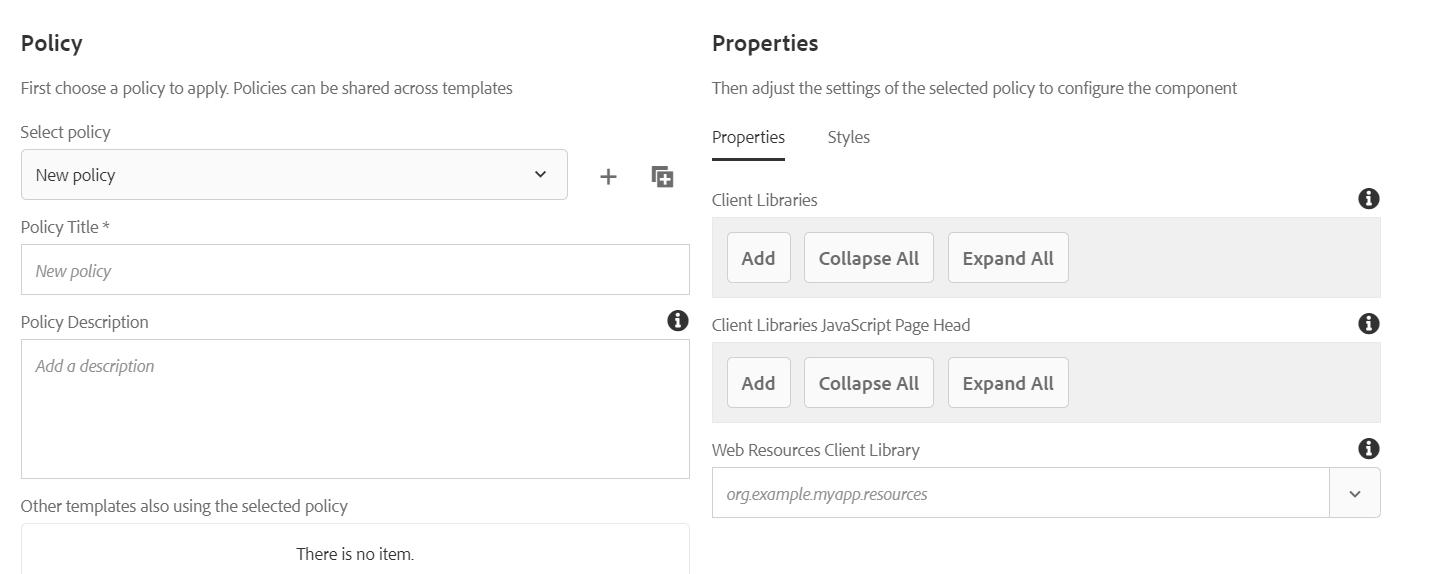
Fig 2: Design Dialog for a Template
If you want to add a template policy then you add fields in design_dialog of page component and you will able to see the options here.
Because the above logic works well for both "Component and Template Level design dialog", that's why developers like to create utility and use it for both.

Demo Video to understand the concept better:

Hope it will help you guys !!
Thanks and Happy Learning.

Sunday, October 20, 2019

Implementing Header and Footer with Editable Templates

Hello Everyone,

I have already wrote a lot about editable templates, but a lot of people ask me about
what is the best way to manage header and footer in AEM with editable Templates.
We-Retail project really mislead us about this concept as in that project, when we drag and
drop header/footer, no need to configure anything. The header and footers itself got populated.
But we never have that ideal use case in real life when we don't need to configure anything
in header and footer.
As there is no inheritance between two templates so what can be best suited
implementation for header and footer.

Solution 1:
Experience fragment is one of the ways to solve this issue as you can create an XF, one
for header and one for the footer and reference those using XF Component in the template
level then all the pages will automatically get the value of header and footer created from that template.

Pros and Cons of Using this approach:

  1. In this approach, you need to drag and drop XF component in place of header and footer on each template and link it to corresponding XF.
  2. If you are using the same content for header and footer,you can put it in the structure of the initial template, then you don't need to drag and drop it  in each template, but if you have multiple sites using same initial template,I won't recommend it as different sites may have different header and footer XF.
  3. If you are using XF, it is best to drag and drop and configure on each template individually.
Demonstration Video of Implementing Header and Footer using XF in editable Templates:


Solution 2: There is one more solution which I prefer the most and used in my two recent projects, It goes well in both cases static/dynamic templates.

  1. Create a template (may be home-page template) for the root-page to configure header and footer of the site under which all the pages exist.and provide a configuration to configure rootPath in the page properties of the home-page template.
  2. Make the change in body.html and add the "pageheader.html" in body.html and include the below code in pageheader.html.
    <sly data-sly-test.resourceType="${pageProperties.sling:resourceType}"/>
    <sly data-sly-test.mode="${resourceType == 'aem-project/components/structure/homepage' ? 'edit' : 'disabled'}"/>
    <sly data-sly-test.rootPath="${inheritedPageProperties.rootPath}"/>
    <sly data-sly-test.header="${rootPath}/jcr:content/header"/>
    <header>
       <sly data-sly-resource="${ @path= header, resourceType='/apps/aem-project/components/content/languagenavigation', wcmmode=mode}"></sly>
    </header>

  3. By this approach all the templates and pages will share the same header and footer and author can only change the header and footer at the root Page level.
  4. All the pages inside the rootPage must inherit the home-page component.Then only the logic of header footer will work fine.

Pros and Cons of this solution: 

  • You don’t need to drag and drop the component on each template.On the root Page itself you can change the content.
  • Any author can change the header and footer at the root page.
  • The header/footer should work with MSM based live/language copies. You can change the value of the rootpath by rollout configuration for each live/language copy.
Demonstration Video of Implementing Header and Footer using the above approach:

Solution 3: You can create a template for the root level and provide configurations for all the header and  footer in the page properties and fetch the value by calling inherited Page properties and all the pages will share the same header and footer.

Pros and Cons of this solution: 

  1. No Need to put any additional logic to render header and footer and the configuration of header and footer is free from template.
  2. If header and footer has so many configurations, your page properties may look messy.


Hope it will help you guys !!
Thanks and Happy Learning.

Friday, October 18, 2019

Troubleshooting in AEM 6.2

Hello Everyone,

I started this blog a bit long ago, but I am publishing it today because “it’s never
too late to mend :-)

Recently I am working on AEM 6.2 and I faced few issues in my project. I am not sure if the same issues exist in updated versions of AEM or not. But if you are facing similar issues in your project, this blog might help you.

Issue 1:
While doing AEM server set up, when you up AEM 6.2 jar using "nosamplecontent"
runmode and login the server using admin also, you won’t be able to see the repository
in the crx repo.
Fig1: crx Repository Not visible
To solve this issue, you need to change the value of Root Path as "/crx/server" in
"Apache Sling DavEx Servlet" OSGi Configuration.
Fig 2: Apache Sling DavEx Servlet

Issue 2:
In AEM 6.2, While opening the page, console shows the issue
Uncaught ReferenceError: CQ is not defined”.
Many people has suggested different solution to this problem in internet.
The solution which worked for me is: Add a dependency “cq.shared” in the
clientlib “/etc/clientlibs/foundation/main” and this issue will no more visible to you.

Issue 3:
When there are a lot of components/requests on a page(ideally more than1000) 
in AEM 6.2 and we are also running samplecontent on our AEM, then sometimes
you are not able to go to edit Mode and encountered this exception
org.apache.sling.api.request.TooManyCallsException”,
Because there are max sling requests already defined in an OSGi Configuration
and to solve this issue and increase the size off sling requests.
To solve this issue, Go to the OSGi Configuration "Apache Sling Main Servlet"
and Increase (may be 10000) the "Number of calls per request".
Fig 3: Apache Sling Main Servlet


Hope it will help you guys !!
Thanks and Happy Learning.

Wednesday, October 16, 2019

How to set password policy for AEM Users

Hello Everyone,

In my recent AEM project, Adobe was the one who was handling servers and one day
when I was trying to create users in AEM via classic UI, so there was no error while
creating users but when i search for that particular user, i could not able to find the user.

I raised this issue to Adobe and got to know that they have made a configuration
for password constraint and while making users we need to follow that constraint.

Now the question is where Adobe defined the constant for password policy and is
it a good thing to do?

There is one OSGi Configuration in Felix console which is “Apache Jackrabbit
Oak Authorizable ActionProvider”.
Fig:Apache Jackrabbit Oak Authorizable ActionProvider

In this configuration enable the “PasswordValidationAction” in the “Authorizable Actions
and add the regex in "Configure PasswordValidationAction:Password Constraint".
The ideal constraint defined by adobe is :
(?\=.*\\d.*)(?\=.*[a-z].*)(?\=.*[A-Z].*)(?\=.*[@#%\\*\\-+\=~\\[\\]{}<>\\?].*).{12,}
Which means at least 12 characters,one uppercase,one lowercase, one digit and
one special character.

But it’s completely your choice which regex value you want to configure.
In AEM, by default we can assign any password to a user. But we can restrict
this and force users to strict password validation rule to increase more security
for the users so that nobody can create users with simple passwords and accounts
can be hacked easily.

Note :If you face a similar issue, then yes in classic UI this is an AEM (I checked in 6.5)
issue that it doesn’t show any error if you don't follow the policy but in touch UI,
it shows the error notification.
Note: If your servers are not being handled by adobe but by yourself, it is always
recommended to enable the password constraints for the servers.

Hope it will help you guys !!
Thanks and Happy Learning.

Accessibility in AEM: Bold vs Strong and Italic vs Emphasis

Hello Everyone,

Web accessibility refers to the practice of using website design and development that
removes obstacles of access or usability for people with disabilities(blind people). 
If you want to make your online content accessible to those using a screen reader:
  • Avoid from using style tags such as <b> and <i>
  • Use semantic tags <strong> and <em> (italics)

In AEM, to render content in form of Text we use RTE component and OOTB RTE plugin contains <b> and <i> tags.

Now the question is, if there is any way to convert these tags into the corresponding
semantic tags in RTE component and if yes then how?

Here is the step by step procedure:
  • Add a htmlRules node of type (nt:unstructured) parallel to rtePlugins.

  • Under htmlRules, create a node name “docType” of type nt:unstructured.
    • Add a property called baseType of value “html”.
    • Add a property called version of value “4.0”.

  • Create a node “typeConfig” of type nt:unstructured under the node docType.
    • Add a property called isXhtmlStrict of  boolean {true}.
    • Add a property called “useSemanticMarkup” of boolean{true}.

That’s all. You drag and drop the RTE component and configure the bold and italic plugins. The <b> and <i> will automatically get converted into corresponding semantic tags i.e.,“strong” and “em”.

Below is the screenshot that shows how the tag gets converted into its semantic tags.
Fig: After Converting Semantic Tag
Advanve UseCase:
If there are any other tags which you want to convert into corresponding semantic tag
or if you want to convert <i> to <em> but don't want to convert <b>, or want to
convert any other tag for example <u> to <label> tags, so you can put mapping also..
In continuation with the above steps, we need to add one more step as shown below.
  • Create a node “semanticMarkupMap” of type “nt:unstructured” under the node “typeConfig”.
    • Add a property b and value as "b".
    • Add a property i and value as "em".
    • Add a property u and value as "label".


This is how the DOM looks like after the above mapping. By the advanced use case you can convert any tag to any other tag just by configuring the mapping here.
Fig: The DOM after mapping of tags
Note: "label" is not a semantic tag of "u".I just want to show the example of how to map one tag to some other HTML tag in RTE.


Hope it will help you guys !!
Thanks and Happy Learning.